How to Paint a Laminate Bookshelf- Well- in One Afternoon
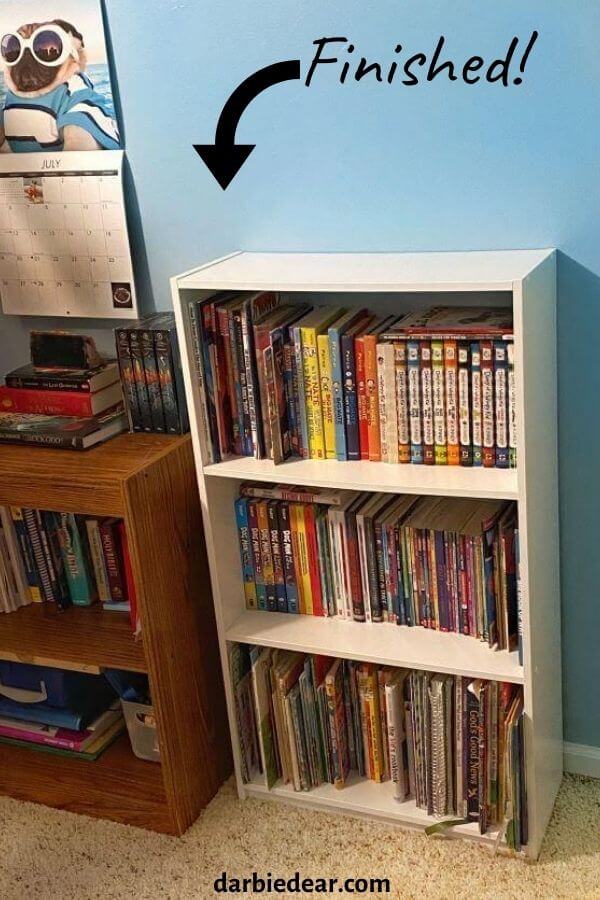
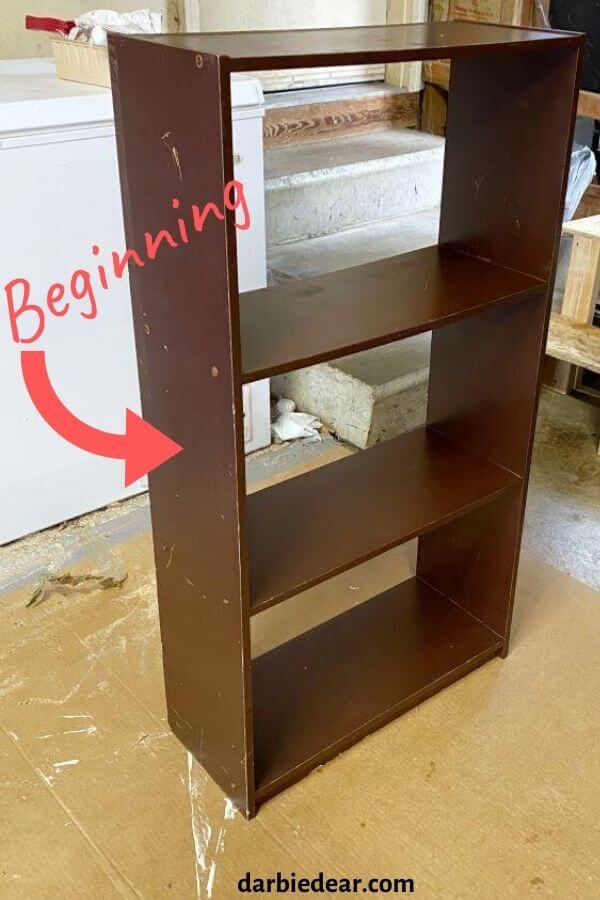
I picked this cheap laminate bookshelf up from a Facebook Free-cyclers page many years ago. Up until now, it and its twin have been gathering dust in our garage. I swore to my husband that this would be the year that I finally refinished them.
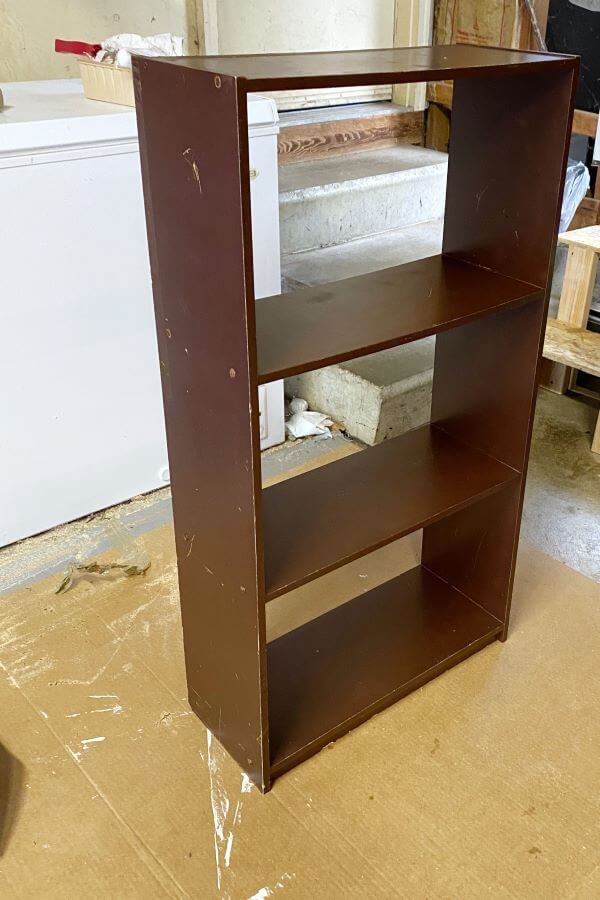
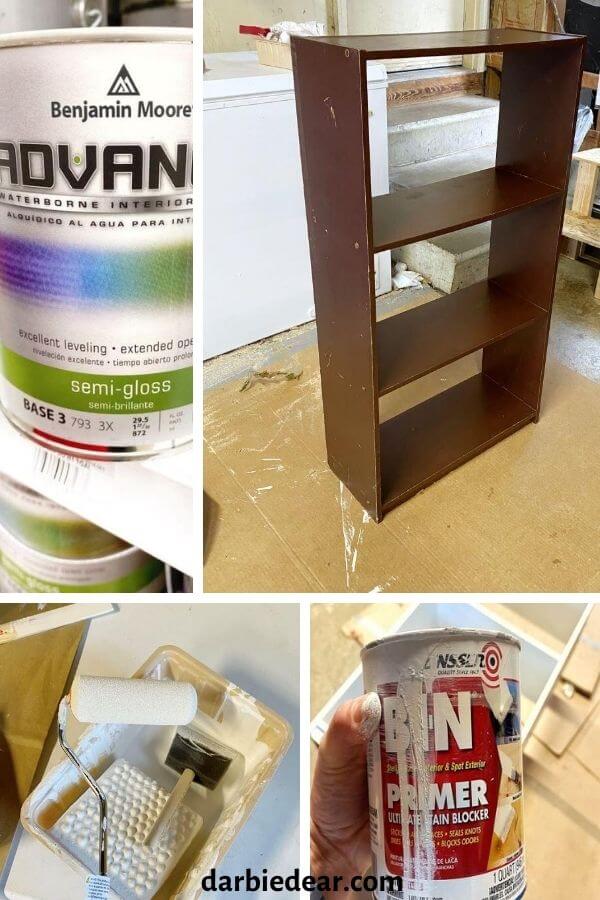
This bookshelf is made of a laminate like substance, that I think was spray painted a glossy maroon like brown type color by the previous owner. Other than a few nicks, it is in pretty good shape, so I hated the thought of throwing them out or giving them away.
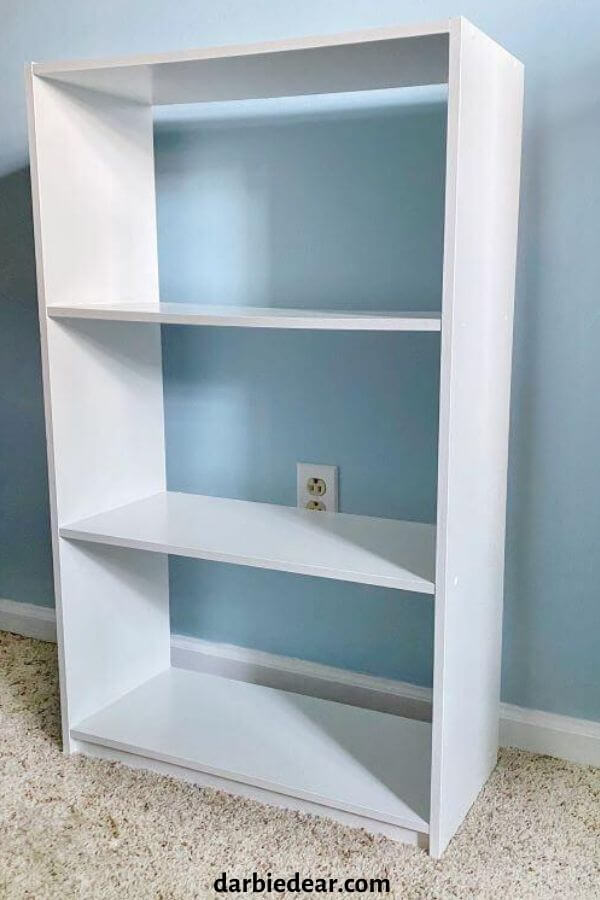
I decided to repaint them and put them in my youngest son’s bedroom.
If you are facing the same dilemma and have piece of old laminate furniture laying around- read below for how to paint that old piece of furniture and give it new life.
Is Painting Laminate Furniture Difficult?
Repainting this bookshelf was not hard at all! This is definitely a beginner level project.
This is probably one of the easiest projects I’ve tackled so far- but it is important to use the right products and complete the steps.
What Helped Make the Project Easy
I had planned on painting the old bookshelf white- since it would easily go with everything and easily transition as my son’s taste change as he get older.
The local Ace Hardware paint pro recommended Bin Zinsser Shellac-based Primer since the bookshelf material was laminate and it had some type of glossy spray paint on it.
He said the Bin Zimmer Primer would cover the dark color well and help the top paint color adhere.
He added that the Bin Zinsser primer would also make the paint less likely to flake off and it dries quickly.
Secondly, the weather was in the mid to low 70’s while I completed this project. Perfect temperature for the paint to dry well and quickly.
Supplies for Painting Laminate Furniture
Gathering supplies for painting the bookshelf was not labor intensive.
I was able to find everything at my local Ace Hardware -and some things I already had laying around the house- like medium grit sandpaper and Simple Green.
- Medium Grit Sandpaper, block prefered
- Respirator Mask- use during sanding and priming
- Lint Free Rag
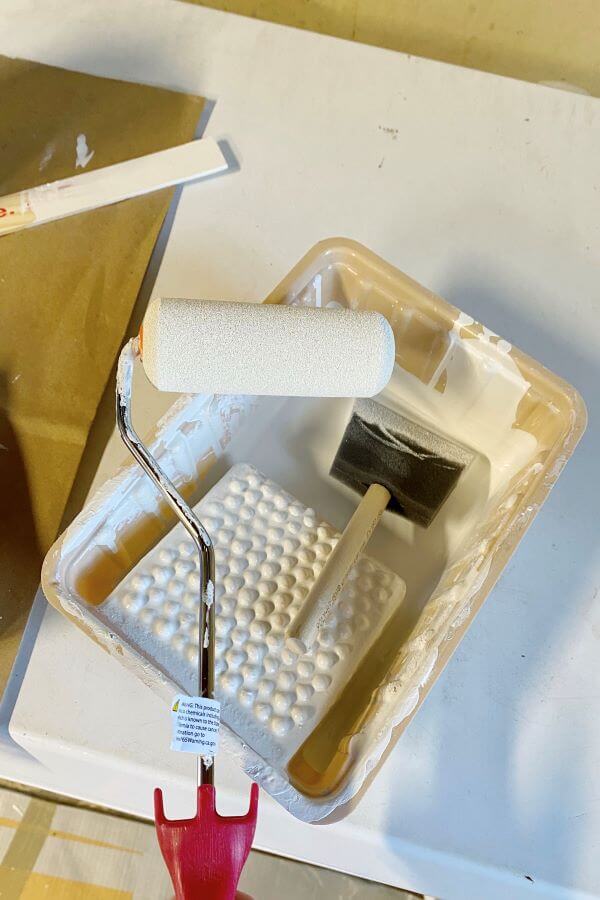
- Foam Roller, 2
- Foam Brush, 2
- Small Paint Tray
- Simple Green
- Bin Zinsser Primer, 1 quart
- Small Can of Benjamin Moore Advance Interior Semi-gloss paint (good for wiping off hand prints and such)
Important: A place to paint where you have good airflow and low humidity- for me, this was the garage.
Good airflow will help the primer and paint to cure and dry well- in addition to keep the fumes low for you.
Low humidity and not too hot– will also help aid in the paint adhering and drying well.
Extra Helpful Supplies:
- Crate or box for laying bookshelf on
- Glossy cereal box or another glossybox, broken down (paint doesn’t stick to it)
- Large broken down cardboard box, newspaper, or drop cloth to paint on.
Pro-Painting Tip:
Make sure your Bin Zinsser Primer and Benjamin Moore Advance Semi-gloss paint have been recently shaken at the paint store.
This will make it so you do not need to stir the paint as much, with your stir stick.
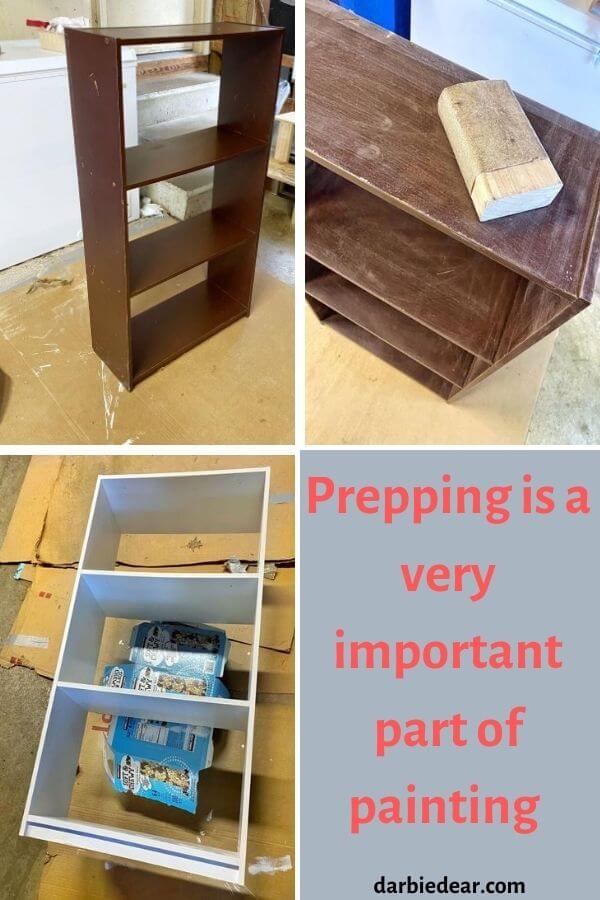
Prepping to Paint Laminate Furniture
Whether your bookshelf has lived in the garage and is a dirty mess or it has been in your house, cleaning it is a must.
1. Cleaning
I like using Simple Green All Purpose cleaner, it cuts through grease, grim, and dirt gently, effectively, while being non-toxic.
I simply prepared the Simple Green in a bucket, according to the instructions, and wiped the bookshelf down well with a rag.
Make sure it is completely dry before starting step 2.
2. Light Sanding
After the laminate bookshelf has dried, it is time for the medium grit sandpaper.
A respirator mask is recommended for sanding due to the little particles that it kicks up.
Why Sand Laminate Furniture
Sanding will help rough up the glossy coating on the bookshelf allowing the primer to adhere better- which will then allow the paint to adhere better.
This is such a light sanding that it really doesn’t take very much time.
How to Sand old Laminate Bookshelf:
Medium grit sandpaper comes in a sheet or block- I prefer the block because it’s easier to handle and get a more even sanding.
You can purchase blocks of medium grit sandpaper or you can make your own.
Run the sandpaper all over the bookshelf- This helps to rough up the smooth, glossy, laminate finish of the bookshelf allowing paint to adhere better.
When sanding, you can make circles, you can move your hand back and forth, you can do all of that. Make sure to scuff up the whole surface– including the crevices.
Wipe Laminate Surface after Sanding
Next take a lint free rag or microfiber cloth and wipe the dust from sanding off of the bookshelf.
If you aren’t able to wipe off the dust sufficiently, take your Simple Green soaked rag and wipe the shelf off, then allow it to dry.
I had to do this step. It dried very quickly.
How to Make Your own Sanding Block:
For this project, my husband had a block of wood lying around from a previous project and simply wrapped the medium grit sandpaper around the block and stapling it to the block.
Sanding with a block makes the sanding go faster and you have more control.
If you can’t make your own block or are unable to find a sandpaper block, using a sheet of medium grit sandpaper to sand would be fine.
Painting Area Prep for Laminate Bookshelf Painting
While you wait for the clean bookshelf to dry, it’s a good time to grab your painting supplies and prep the area.
- Drop cloth, newspaper, or broken down large cardboard box
- Bin Zinsser Primer
- Small paint tray
- 2 Foam rollers
- 2 Foam paint brush
- Crate or boxes
- Broken-down cereal box, any good size glossybox.
Prepare the Painting Area
Lay down the material- drop cloth, newspaper, cardboard- that you will be painting your bookshelf on.
Place your bookshelf and crate with glossy box onto your paint catching material.
2 Must Know Hacks for Painting Bookshelves:
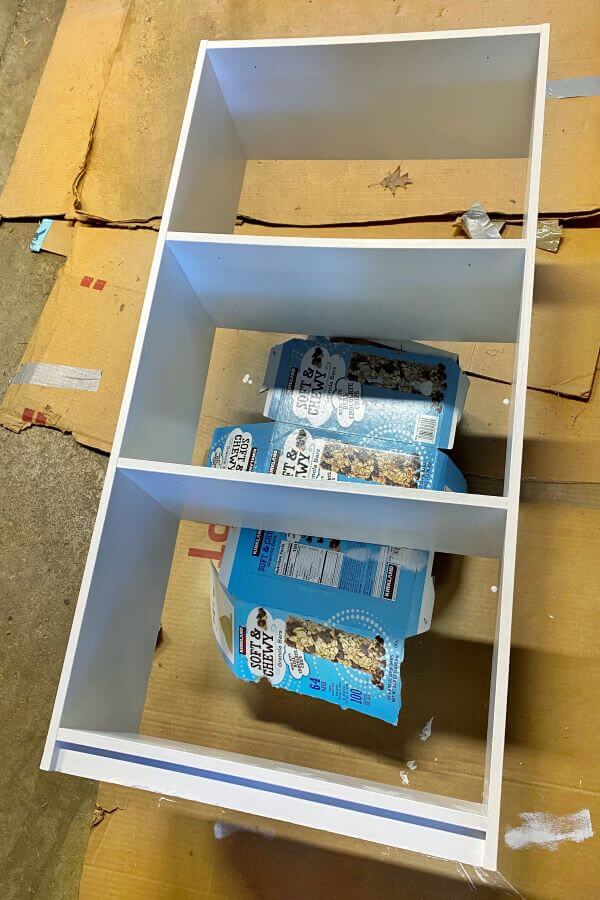
All of the painting supplies are probably self-explanatory, except for the crate, or box, and cereal box.
I found it was easier to paint the underside of the bookshelf shelves, and the bottom of the bookshelf, when I could lay it down on an old crate.
To keep the paint or painted side of the bookshelf from sticking I placed a broken down cereal box-glossy side up- between the bookshelf and the crate.
A cereal box– any glossy box will do. As you can see in the photo, I used an empty Costco granola bar box to lay between my crate and the bookshelf.
Why this works: The glossy finish of the box keeps any paint from making the box and the bookshelf stick together. This makes it easier for to you get those edges painted without fear you will be picking paper off of the shelf once it has dried.
Prior to figuring this out, I was contorting into all kinds of uncomfortable positions trying to paint the underside of the shelves.
Hack #2
Depending on the weight of your bookshelf- instead of a crate- you could use several boxes to lay your bookshelf on.
How to Prime Old Laminate Bookshelf
You’ve prepare the painting area- Next, is the fun part- grab your Bin Zinsser Primer, small painting tray, foam brush, and foam roller -and it is time to start painting!
With painting cloth or box laid down, the crate and glossy box prepped, it is time to pour the Bin Zinsser Primer into the small paint tray
Prime Laminate Top to Bottom
While my bookshelf was upright, I started painting top to bottom of the bookshelf- I found this to be easiest.
1. Starting with Corners
Use the foam brush to paint in the corners of the bookshelf first.
2. Next Body of the Bookshelf
Then as the corners dry, used the foam roller to roll primer on to the top, sides, and bottom of the bookshelf (place where your books rest).
3. Prime the Back of the Bookshelf
While the front dries- and it is still up right- prime the back of the bookshelf.
Once the back of the bookshelf is dry, lay the bookshelf onto the glossybox/ crate stand. With dry side on the glossybox.
4. Prime Underside of Shelves
From there, paint the undersides of the bookshelf shelves with the paint roller and foam brush- undersides are the parts you cannot see of the individual shelves.
5. Prime Very Bottom
Then prime the bottom of the shelf that had been close to the ground.
6. Repeat Laminate Priming Steps
After this first coat of primer dries, put on a second coat of primer on repeating the steps above.
Why Two Coats of Primer for Laminate Bookshelf
I decided to do two coats of primer for several reason:
- A little of the Bin Zinsser Primer goes a long way- no need to not be generous with it.
- This bookshelf is a dark color and since I was painting the bookshelf white, I didn’t want to risk the dark color bleeding through and then having to do 3+ coats of white paint.
Warning Before You Begin Priming:
I want to warn you of two things before you open the Bin Zinsser Primer, the smell is strong!
This is one reason to make sure you are painting in a place with good airflow and using a respirator mask.
Secondly, the Bin Zinsser Primer is thinner than regular paint so it pours very quickly.
How to Paint Laminate Bookshelf with Paint
Once the primer is dry the it is time to repeat the whole process- but this time with paint.
For painting this bookshelf, I chose Benjamin Moore Advance Semi-Gloss. This was recommended by the paint guy at ACE Hardware.
The Benjamin Moore Advance Semi-Gloss Interior paint line has low VOC’s and the paint “cures” making the painted area harder and less prone to dings. Which is perfect for a bookshelf destine for a kid’s bedroom.
Since this bookshelf was slated to go into my son’s bedroom, and kids can be messy, semi-gloss was the perfect sheen option for the paint.
Semi-gloss is easy to wipe down and resists moisture more than most sheens.
I chose white for the bookshelf color because I wanted my son to be able to use it as he grows and his bedroom décor changes. I have to say that was not my first inclination, visions of stencils, and stick-peel wallpaper danced in my head. It took a lot of will power to go with white. 🙂
Painting the Laminate Bookshelf
A fresh sponge roller and fresh sponge brush will be used for part two of this project- paint.
You will need to continue to utilize the box / crate, glossybox assembly.
Painting a primed laminate piece of furniture is done just like we did with the primer.
Before Starting Pro-Tip
If you use the paint tray that you used for the primer, make sure the tray has been cleaned out or the old primer has dried overnight before you pour in your paint.
1. Stir
Give the paint a good stir with the stir stick and then poured it into a small paint tray.
2. Next Prime Body of the Bookshelf
Like the primer, starte to paint the bookshelf top to bottom.
Once again use the foam brush to paint in the corners of the bookshelf.
Then as that dries, use the foam roller to roll paint on to the top, sides, and bottom shelf of the bookshelf.
3. Paint the Back of the Bookshelf
While the front dries, then it’s time to paint the back of the bookshelf.
Once the back of the bookshelf is dry, lay the bookshelf onto my glossybox/ crate stand combo- just like with priming.
4. Paint the Underside of Shelves
From there, paint the undersides of the bookshelf shelves with the paint roller and foam brush- just as you did when previously priming.
5. Prime Very Bottom
Painted the very bottom of the shelf that is close to the ground.
6. Repeat Laminate Priming Steps
After this first coat of paint dried, I put on a second coat repeating the steps above.
Got Dribbles? Paint Dribble Hack:
Sometimes paint or primer run and make little dribble marks. And if you are like me, you only find them when the project is done. *sign*
Luckily for both of us, there is an easy cure. If you find a dribble mark, and it is too late to correct it with paint, allow your project to dry.
Then take your medium grit sandpaper from our paint prep, and gently sand down the dribble mark. Then use a small paint brush to reapply the paint to that small area.
Voila!
Takeaways from Painting Old Laminate Bookshelf
From start to finish this project took less than a day.
I only wish I had kept track of the time so I could give you a more accurate time frame. I started sometime after lunch and finished before a late dinner.
To be cautious, I allowed it to dry over night just to be sure it was very good and dry- before putting books on it.
What Made the Project go Smoothly
Things that helped the project go smoothly, would be number one- the weather. It was about 73 degrees and not really humid. It is recommended that for paint to dry well and timely, try to paint in weather that isn’t too humid and when the temp is between 50-85 degrees and less than 40-50% humidity.
The other thing that helped this project go smoothly, was making sure I had everything prepped and near by before I got started.
Thoughts Overall
Over all, this was such an easy project that I am itching to refinish the sister bookshelf. Maybe I’ll actually get to use my stencils or stick and peel wallpaper this time!
I hope this how-to helps you next time you tackle painting old laminate furniture.
What is your favorite project that you’ve tackled? Was it harder or easier than you thought it would be?