Last Updated on November 17, 2020 by Holly

I’ve been redoing my teenage son’s bedroom. It has been an interesting adventure. I have had to often remind myself; this room is not entirely about what I want. He is a senior, and its his personal space. A personal space that has cool, mint colored wall, he has wanted his favorite color red to be involved, and have New York City featured- because he loves the city.
In order to bring the red, gray, white, and mint together I started looking for curtains as well as wall art. Etsy proved very helpful, I was able to grab some art prints there that had bits of the colors I needed. Then I went to the internet looking for curtains.
It is so hard to find curtains for a boy’s bedroom, let alone a teenage boy bedroom. The patterns were either too young looking, didn’t have a mix of red and mint, too bland, or too darn expensive. It was exhausting.
Then, I had a conversation that changed everything. I was lamenting to my friend about my curtain debacle, and the color challenge I was facing and she said the one thing I had never thought about,” Why don’t you make your own? Have you checked Etsy for fabric?” Whaaaaa?! Mind blown. What had I not thought of that?!
My friend makes face masks and told me she gets almost all of her fabric from Etsy. What she loves the most about purchasing fabric from Etsy is that she is guaranteed to find unique patterns there. She was right!
Once I fell down the glorious Etsy rabbit hole, I eventually landed on the shop, Affordablehomefabic. They have an interesting mix of fabrics, but the one that immediately caught my eye was their P Kaufmann East Coast City New York Brights Fabric. It caught my eye immediately because it had a New York City print with the colors gray, red, and mint woven in. Perfect!
To top it off, 2 yards of their duck cotton fabric- with shipping- was going to cost me less than purchasing premade curtains that were meh.
If you have ever found yourself in a similar situation, give making your own curtains a try.
In this tutorial, I will walk you through how diy curtains without a sewing machine.
How to Measure for DIY No-Sew Curtains

The simple no sew curtains I made do not have a rod pocket to include in the measurements- although you can absolutely do that using fusion tape.
These simple curtains hang with curtain rod clips keeping them simply easy, yet they still look good.
An important thing to know when making a simple curtain, like these, is that good measuring is very important.
Width
It is standard to measure the size of your curtain rod for the width of your curtains. For some of us that will be close to the width of our windows.
If your curtain rod is fancy and has a finial or decorations on the ends do not include those in your measurement.
Just measure from the base of one finial to the other.
When measuring the width for your curtains, you will want the want the fabric width to be to 2 times more than the pole, then add 4” to that measurement.
The extra 4” is for the 1” hem that will be on each side of the panels.
Height
First determine in what style you want your curtains length to be-where will they hit?
Ex. Café Style curtains hit at about 1” below the window sill. Or do you want them to puddle on the floor elegantly?
Now that you’ve determined where you want your curtains to hit, grab your measuring tape and measure from where your curtain rod is, or will be, to where you want your curtains to hit.
Then add an extra 2” to that measurement for the hemming folds. This will be for a 1” hem at the top and 1” hem at the bottom.
Example Calculations
Your width measurement is 54”, 54 x 2= 108 inches, + 4” = 112 inches of width, now divide 112 by 2= 56”
In this example each panel of fabric will need to be at least 56” in width.
Desired curtain length- 70”, add 2” for the 1” hem at top and bottom. 72” +2” = 72” in length. Now divide 72” by 36” (which is 1 yard in inches. 😊). 72/36 = 2 yards of fabric.
In this example, we would need 2 yards of fabric that is a total of 112 inches in width so that each curtain panel will be 54” wide and 70” in length.
Mistakes Were Made, Part #1
Measurements
At this juncture, I did not realize that I had made a mistake. I’m going to admit to you right now, in my excitement and haste, I mixed up my width and length, and I misunderstood how the fabric pattern would lay.
My advice to you, if you are super busy like I am, slllooooowwww down.
Luckily everything worked out well, but it was not without a little bit of nervous sweat on my part.
I thought the pattern would be horizonal instead of vertical.
And since I mixed up my length and width, the hems of my curtains-on all 4 sides-had to be taken in a minimal amount. Basically, just enough to cover the hem tape and create a hem.
Two things worked in my favor:
1. the pattern looks great vertically, I actually prefer the aesthetic
2. I did not want these to be overly long curtains to begin with.
Take Away
Slow down, ask questions and double or triple check those measurements.
Making Curtains without a Sewing Machine

Items needed:
- Hem Tape, Super Hold
- Fabric of your choice
- Scissors, Fabric scissor preferable
- Iron
- Curtain Rings for hanging
Cut the Panels

Cutting the panels is fairly easy. If you don’t have a straight edge of some sort, which I don’t, I recommend folding your fabric in half- end to end long ways- and iron that fold creating a crisp edge to cut.
After you’ve made a nice crisp edge, cut.
Examine Your Fabric
If you haven’t already, it is important to give your fabric a good examination.
It was at this point that I also came to realize two things, I would have to keep a raw, frayed edge instead of double folding the edge which would have incased the frays.
Secondly, as you can see in the picture, my fabric had a blank boarder which meant I was immediately going to lose more fabric than I anticipated.
Again, this would not have been an issue if I had not messed up my measurements.
Start Your Irons, No Sew Curtain Hems

Since I have made no sew curtains several times and since I had to hem as little fabric as possible, I felt confident folding my fabric over the fusion tape as I went.
However, if this is your first-time making curtains, I am going to give you several suggestions to help you feel more confident.
Double Fold Crisp Edge Hack
If you would like to double fold for crisp edges, unlike myself 😊, here is a little trick my grandmother taught me.
I recommend starting on the length side, but it doesn’t really matter, and since we measured enough fabric for 1” hem on each side we will need to break that in half for the double fold.
- So, measure with your measuring tape ½ inch, fold it and use a sewing pin to in it into place.
- Continue folding and pinning the length of the fabric.
- Turn your iron on Wool or Cotton and iron the line crisp.
- Allow to cool.
- Take out the pins and fold the fabric over itself again- you should no long see the cut line or fray- pin and iron as you did previously.
- Repeat for the other 3 sides.
This has just given you an easy way to slide in your fusion tape and feel confident about your line. It will also make the process of fusing even more easy.
Tape Fusing the Hem

Now open up the flap of the fabric and insert fusion tape, following the instructions on the back of the box.
** Repeat this process on the other 3 sides of each panel.
Pro-tip:
I find it easiest to apply the tape in 5 or so inch strips, iron that section, repeat.
Single-Fold Crisp Edge Hack
You can do one-fold if that is what you like, these are your curtains after all. If you have never done this before, you can make your life easier by folding and pinning to create a nice crisp fold to later insert your fusion tape.
- Take your tape measure and measure a 1” fold.
- Fold the fabric over, using sewing pins to hold it into place.
- Go down the length of the fabric, pinning 1” fold into place.
- Turn your iron on Wool or Cotton and iron the line crisp.
- Allow to cool and then take out the pins.
- Repeat for the other 3 sides.
Tape Fusing the Hem
Now open up the flap of the fabric and insert fusion tape, following the instructions on the back of the box.
** Repeat this process on the other 3 sides of each panel.
Pro-tip
I find it easiest to apply the tape in 5 or so inch strips, iron that section, repeat.
Mistakes Were Made, #2

Fabric Fusion Tape
I accidentally purchased the wrong strength fusion tape.
I purchased regular hold. I believe the regular hold will endure, but it was not as quick to work with and not without hiccups!
I have made diy no sew curtains previously out of fabric and bed sheets. When you use “Super Weight” “Ultrahold” or “Heavy Duty”, the fusing tape works more quickly and I can attest to its durability.
This took more ironing than I had previously experienced and at times I had to double layer the tape for good adhesion.
But again, if you use the correct level of hold- Ultra or Super- you shouldn’t run into any of these issues.
Fraying and Measurements

Since I measured incorrectly, I was left with a frayed edge that I could not hide.
I also had used the wrong level of fusion tape bonding, so I was concerned how well the fraying would be kept at bay.
The fraying was on the underside of the curtains. No one would see it, but I was worried that the curtains may become damaged more easily.
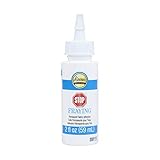
Luckily, I had a little product called STOP FRAYING permanent fabric adhesive by Aleene’s. This stuff is amazing, I’ve actually used to repair fraying on clothes, so I knew it would work well here.
I went about running a small line of it down the fray line- as per the instructions- and let it dry.
*I later laundered it; and it washed and dried beautifully!
Side note- I have DIY’d no sew curtains out of sheets and other fabric before, so I know when done correctly, with the right level of fusion tape- they will hold up for years.
More like this:
- Teen Boy Bedroom Makeover Part 1
- How to Paint a Wooden Headboard- Easy way to Instantly Update!
- How to A Paint Laminate Book Shelf
Almost Done

At this point you are so close to done, I’m sure you can feel it.
First, if you haven’t laundered your fabric yet, do that according to its instructions.
Laundry
It is recommended to do this before the no sew curtain assembly process to account for any shrinking. However, I did not do that in on this project because I did not want the frayed line to possibly get worse. I had no fabric to spare! So I took my chances.
My fabric was 100% Duck Cotton, it feels like an all weather fabric, I washed it on cold and hung it to dry to minimize any chances of shrinking.
Back to the Ironing Board
If your curtains are wrinkled give them a good ironing before hanging.
If you prefer steaming them, hang first and steam as is appropriate for your fabric.
Curtain Clips
I love curtain clips! They make it easy to hang curtains and take them off for cleaning or switching.
Now they may not be appropriate for every curtain situation, but for kids and teenagers’ bedrooms they work pretty well.
The curtain rod in my son’s bedroom is thin, so I used 1” curtain rod rings from IKEA, which come 10 in a pack.
They are a great value and they hold up. I bought 2 packs.
The color of the rings and the rod were not a complete match but they were close enough that it would work. And let’s be honest, my son is NOT going to notice that when he is sitting in his room gaming with his friends, LOL!
Clipping
I ended up using 10 clips per panel.
I placed on clip on each end and then eye-balled the distance between the 8 that I used to fill in the space in-between. I’m just being completely honest with you. 😊
I slid the curtain with rings on to the rod, hung the rod back up, and Viola!
End Result

Even though I have made no sew curtains for the bedrooms and the kitchen of my house before, I think I learned more during this bedroom curtain project. I made some mistake, I learned from them and I hope they help you too.
Most importantly, my son loves the look of his new bedroom curtains. The way the New York City print marries gray, mint, yellow, and red together is what is really going to bring his bedroom together; something that I thought might be impossible.
I totally recommend, if you can’t find a fabric you want at a traditional fabric store, give Etsy a try. The amount of fabrics they have available it is mind blowing!
Do you have a DIY project that you’ve made mistakes and learned from? I’d love to hear your story.
Click to shop the post: